Day 14 of the 30 Day Writing Challenge
As a designer, there is nothing more frustrating then opening up another designers working files and discovering that in the process of creating an effect they destroyed the original image. And now you, the person charged with making an edit to that image, has to recreate the entire thing from scratch. There are a lot of different ways to do non destructive editing, so today I thought I would show example of one of the easiest and most useful ones that I have found, the clipping mask. Clipping masks are a super easy way that you as a designer can crop photos in Photoshop without actually deleting any portion of the photo. Here is how it works:
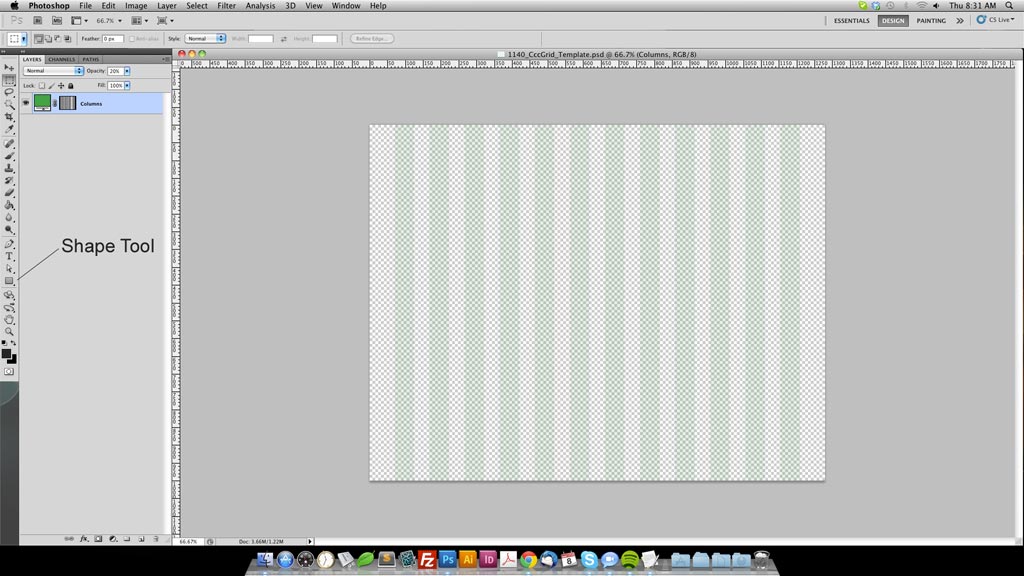
Step 1: Open Photoshop and create a new document. For this example I’ve opened up an 1140 grid template.

Step 2: Select the Shape Tool, and draw the shape that you would like your image to encompass. For this example I’m going to draw a long thin rectangle. I use this shape quite a bit when creating image banners or carousels, which I think we all know clients love no matter what we tell them.
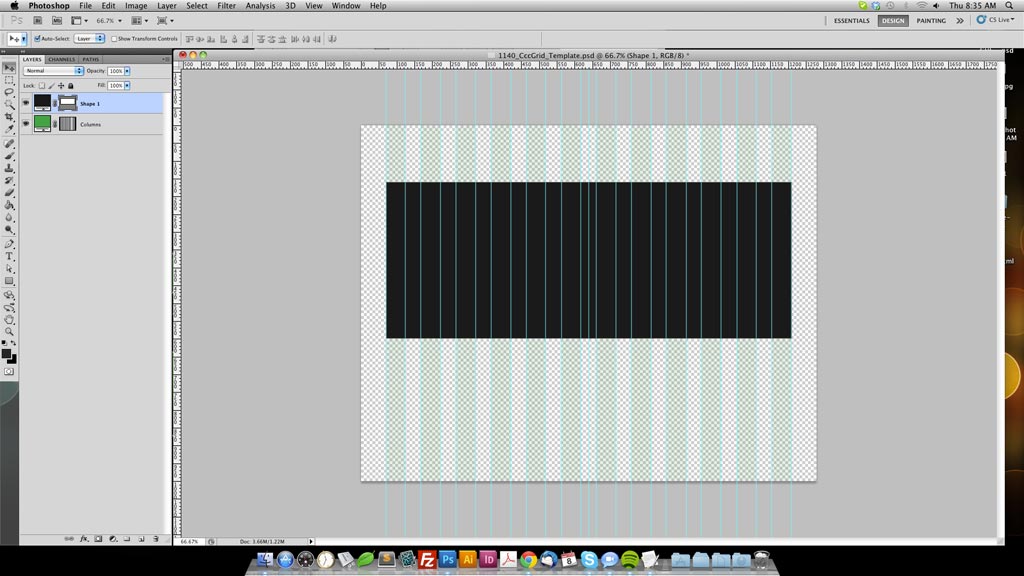
Step 3: Go ahead and bring in your image. The way that I like to place an image in Photoshop is to open the file menu and then select place. I then use the browser to find the image I want to place and then select place. The reason I like to do it this way rather than opening the image and just dragging it over to my new Photoshop document is, when you place it not only does it automatically name the layer whatever the file name is (which is nice for organizing your document) it also brings it in as a smart object. I’m not going to go into all of the benefits of smart objects on this post, but know that smart objects give you a lot of editing flexibility that can really make your life easier once you know how to properly use them.
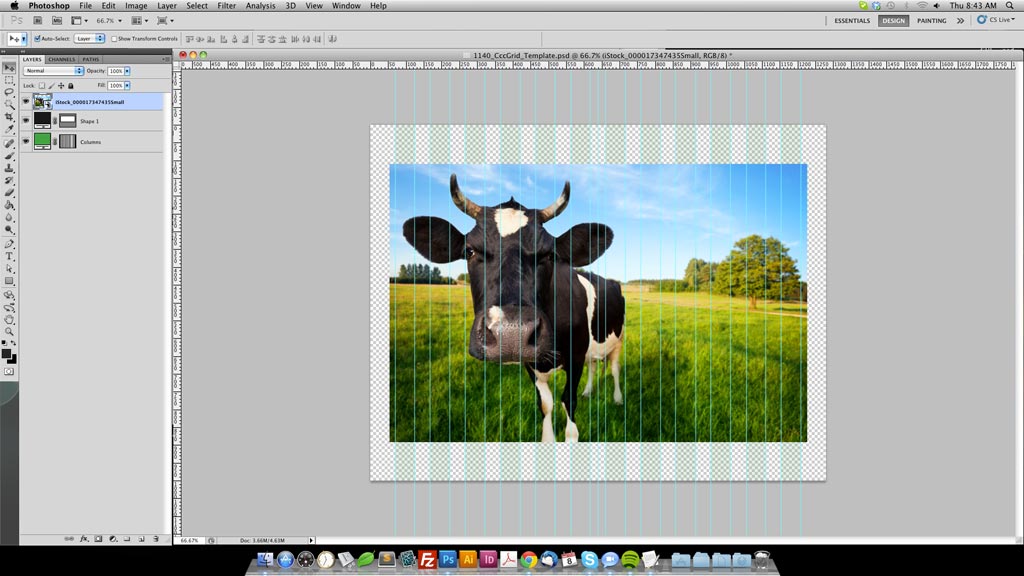
Step 4: Okay, now that we have our custom shape drawn and our image the next thing we need to do is check our layer palette and make sure that the image is stacked above the shape layer. This should have happened automatically if you followed the steps I outlined, but it never hurts to double check. Once you have confirmed that the image layer is above the shape layer go ahead and right click (control-click) on your image layer in the layer palette. This will bring up a menu of options.
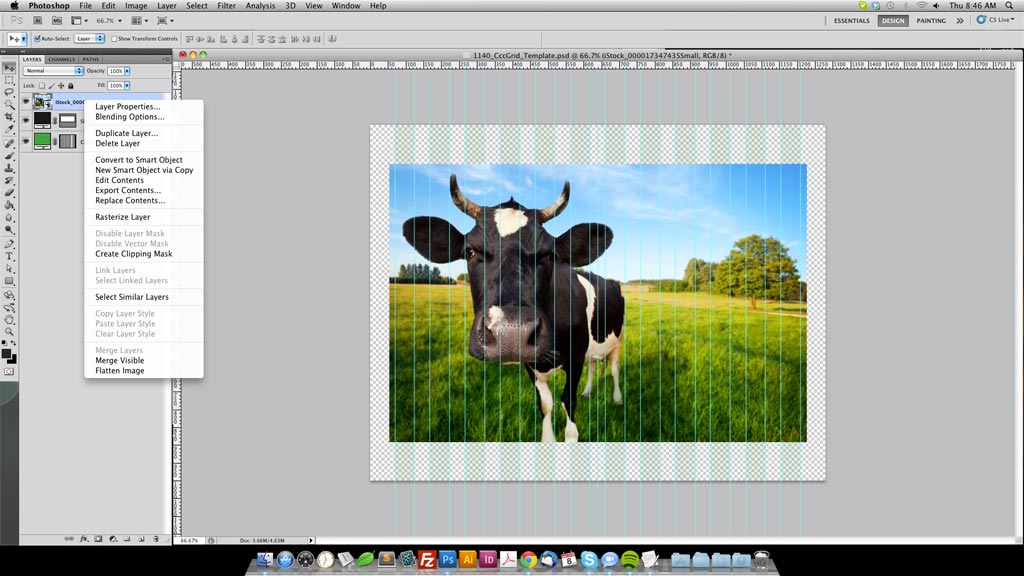
Step 5: Once the menu is up, select Create Clipping Mask from the list of options. Here’s what your image should look like.
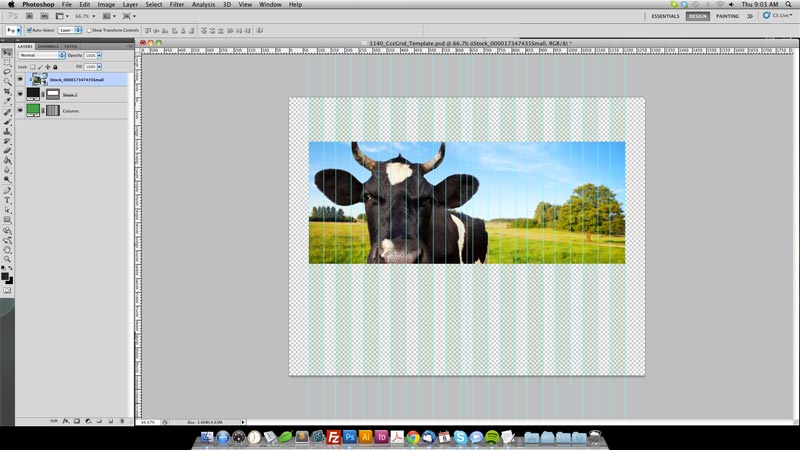
Now you are free to scale and crop the image however you see fit without having to destroy the original image layer. If you find that the image box is not the correct size, just adjust your clipping mask layer.
I hope this helps you out. Feel free to share any other tips or tricks you might know in the comments section.